Table of Contents
Cloud Config File Downloads
Introduction
Welcome to the DevOps Library! This is Samantha, and in today's episode we're going to cover how to use Jenkins templates. Unfortunately, the template plugin itself IS only available to Jenkins enterprise users, but if that's an option for you it does make it much easier to simplify Jenkins job creation.
One common use case is when you have a bunch of nearly identical jobs with a couple of minor differences. Let's say one day you need to modify something on all of them. Normally you'd have to edit each job individually, but if they were built using the same template, you could simply modify it and every job, builder, or folder based on the template would update instantly!
In some cases Jenkins Job builder is a better option, but the template plugin excels if your goal is to make it easier to create jobs. You can also look at it as a way to implement new functionality that would typically require writing a plugin, but without the need to do any actual coding.
Don't worry, by the end of this lesson you'll know how to do that and more.
Creating a Template
Ok, back to our tutorial. First, let's create a new build step template for downloading files. Click "New Item", type "Download" for the name, then select "Builder Template" for the item type. Now go ahead and click "ok" to bring up the template configuration page.
Before we do anything, let's think about what we want our template to do. Since this is a "builder template", it's going to show up on the list of builders of any freestyle jobs we set up, right along with "Execute shell script" and all the other standard Jenkins builders. For this template, let's make a build step that downloads a file to our workspace when given a URL.
It's actually really easy to configure. First, let's add an attribute with an id of "url".
An easy way to think of an attribute is as a template parameter.
We'll stick with "Text-field" for the type, then feel free to add an inline help description if you'd like.
Next, we need to configure the transformer, which is used to tell Jenkins how our builder works. If you're comfortable with groovy, you can do just about anything you'd like here, but for our example we'll go with a generated shell script.
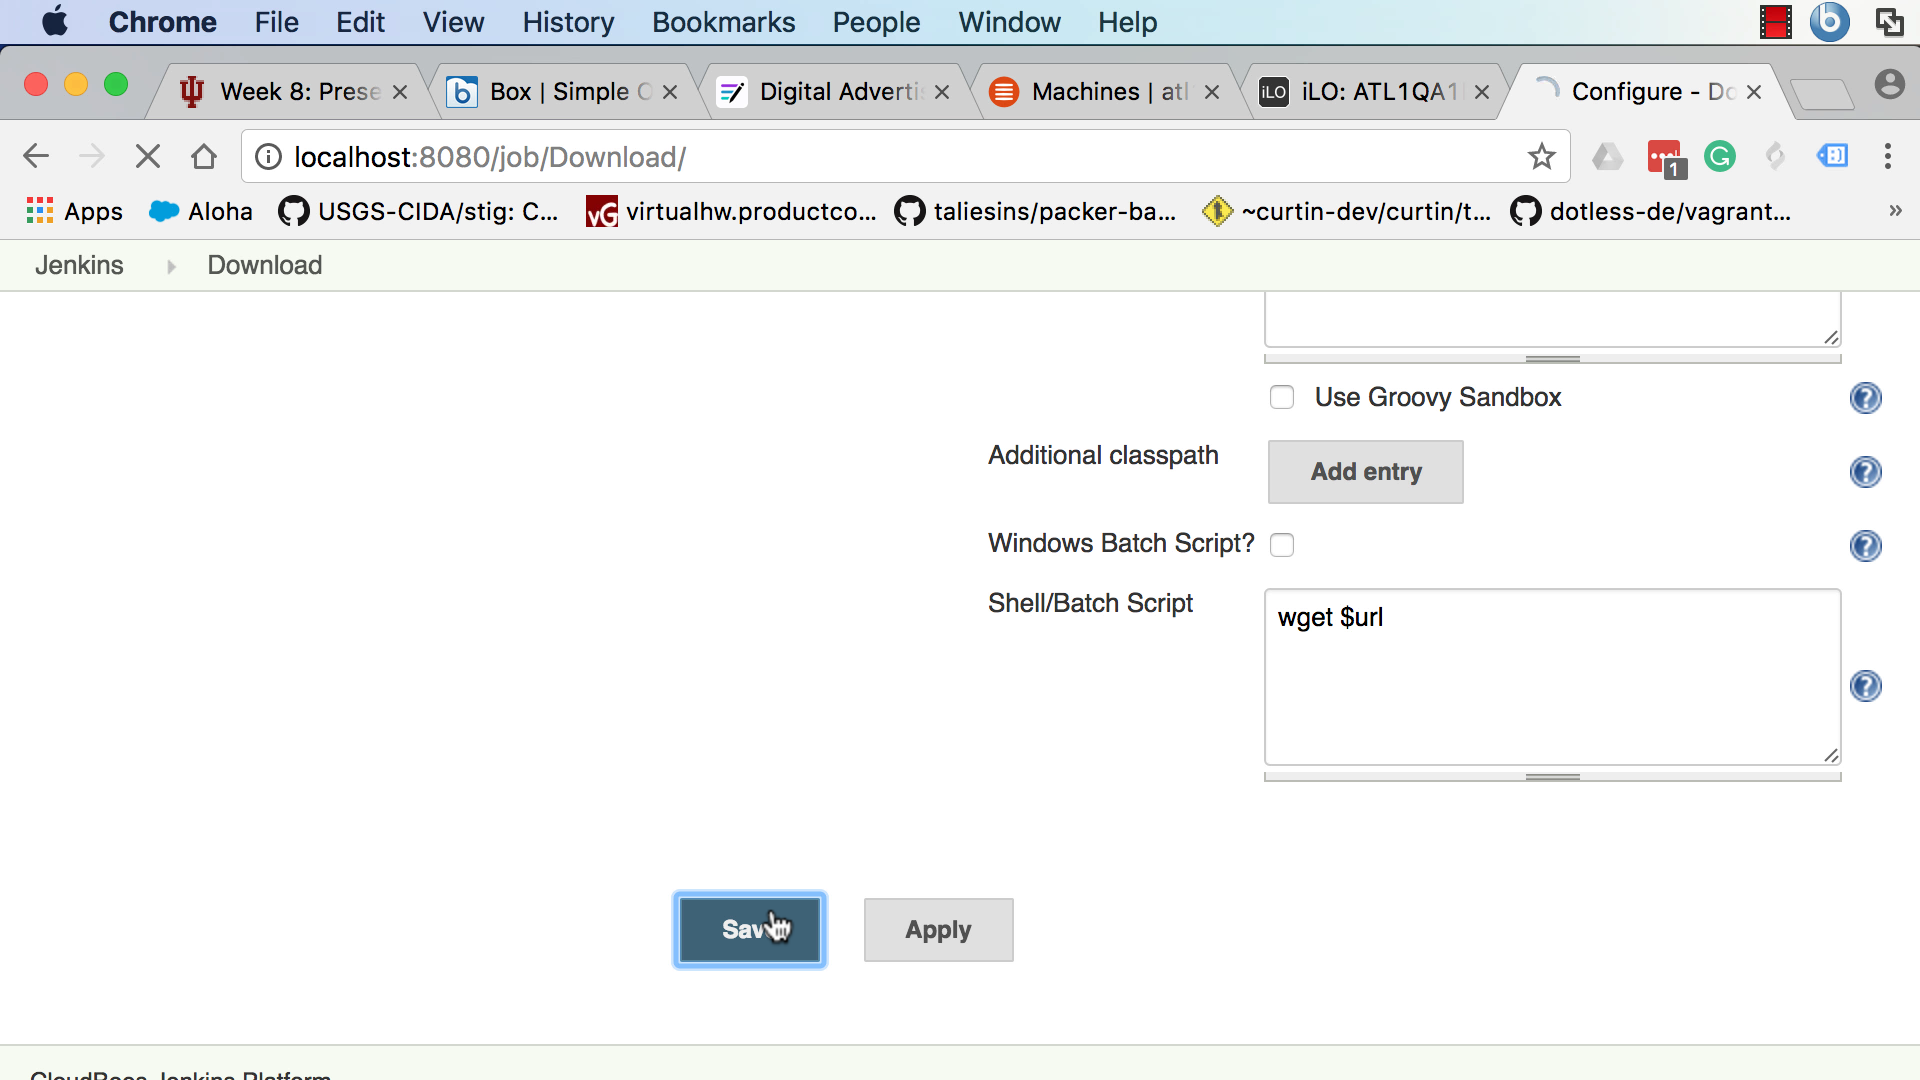
Type: wget, followed by a dollar sign and the name of our attribute, URL. Since the script section is actually a groovy template, Jenkins will populate the URL in our transformer with the URL provided by the user in the attribute. Pretty cool huh? Alright, go ahead and save the template, it's time to try it out!
Create a new item again, but this time name it whatever you'd like, and select "Freestyle project" for the type. Click ok, then scroll down to the bottom until you see "Add Build Step". Look at the dropdown, there's our new build step we just created! Feel free to type any URL that you'd like then run the job. Pretty cool huh?
Summary
While I know our example was pretty simple, keep in mind you're not limited to templating build steps. You can create auxiliary templates for creating nested attribute structures, publisher templates, or even an entire job template.
As we mentioned earlier, one of the best things about using templates is that any time you modify one, it'll automatically update anything else built off of it. For example, let's say you create a job template for testing... a Chef cookbook. A few months later the team wants to add a new linter to every cookbook testing job. In this example, we only have to modify a single template and we're done, making it super easy to maintain large Jenkins environments as well as being able to share best practices between jobs.
Hopefully this lesson has helped you understand when and why the template plugin can be helpful, thank you so much for watching!